
Pink glaze recipe
Want to make your favorite baked treats look instantly prettier? This simple pink glaze takes just minutes to mix!
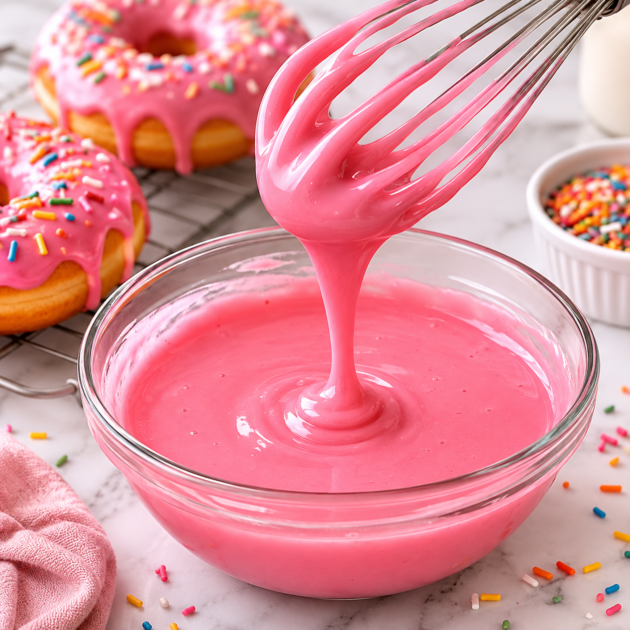
This Pink Glaze Recipe combines powdered sugar, milk, and a tiny pinch of red food coloring to create a smooth, sweet glaze with a beautiful soft pink color.
It’s an easy way to dress up donuts, cookies, muffins, cakes, cupcakes, cinnamon rolls, and sweet breads without making a complicated frosting.
The consistency is easy to customize, too. Add the milk slowly for a thicker glaze, or add a few extra drops when you want a thinner drizzle.
I’ve found that starting with just a tiny amount of food coloring gives you much better control over the shade. You can always add more until the pink looks exactly how you want it.
Why You’ll Love This Recipe
This Pink Glaze Recipe is quick, simple, and perfect when you want to add a pretty finishing touch to your favorite baked treats.
Made with just powdered sugar, milk, and a tiny pinch of red food coloring, it comes together in minutes.
The glaze has a smooth, sweet flavor and a beautiful soft pink color that looks especially lovely drizzled over donuts, cookies, cakes, muffins, or sweet breads.
You can easily adjust the consistency by adding the milk slowly. Use less milk for a thicker glaze or a little more for a thinner drizzle.
In my experience, adding the food coloring gradually is the easiest way to achieve a delicate pink shade without making the glaze too dark.
Ingredients
This Pink Glaze Recipe needs only three simple ingredients and takes just a few minutes to prepare. The key is adding the milk slowly so you can control the final consistency.
- ½ cup powdered sugar
- 2 tablespoons milk
- 1 small pinch red food coloring
For a thicker glaze, you may not need all of the milk. Start by adding a little at a time and mix well before adding more.
For a softer, lighter pink color, use only a tiny amount of food coloring. You can always add more, but it is difficult to lighten the color once too much has been mixed in.
Jump to RecipeHow to Make It
- Add the sugar: Place ½ cup powdered sugar in a small mixing bowl. Break up any visible lumps so the glaze starts smooth.
- Add milk slowly: Begin adding the 2 tablespoons of milk gradually. Don’t pour it all in at once because you may not need the full amount.
- Add food coloring: Add a small pinch of red food coloring to the mixture. Start with a tiny amount for a soft pink shade.
- Mix the ingredients: Use a spoon or small whisk to combine the powdered sugar, milk, and food coloring.
- Mix rapidly: Continue stirring until the glaze becomes smooth and the color is evenly distributed.
- Check the consistency: Lift your spoon and let some glaze drip back into the bowl. It should flow smoothly without being overly runny.
- Adjust if needed: If the glaze is too thick, add a few drops of milk. If it becomes too thin, add a little more powdered sugar.
- Use immediately: Drizzle or spread the pink glaze over cooled donuts, cookies, cakes, muffins, or other baked treats.
Cooking Tips / Variations
For the best Pink Glaze Recipe, add the milk gradually instead of pouring it in all at once. This makes it much easier to control the consistency.
If your glaze becomes too thin, simply mix in a little more powdered sugar until it thickens. If it’s too thick, add a few drops of milk and stir again.
Use only a tiny pinch of red food coloring at first. I’ve found that a little goes a long way when creating a soft pink glaze.
For a brighter pink, add another tiny amount of coloring. You can also use gel food coloring for more concentrated color.
Make sure your baked treats are completely cool before glazing so the icing doesn’t melt and slide off.
Serving or Storage Tips
Use this Pink Glaze Recipe as soon as it reaches the right consistency for the smoothest finish.
Drizzle it over cooled donuts, cookies, cupcakes, muffins, cakes, cinnamon rolls, or sweet breads. For a more decorative look, use a spoon to make thin zigzag lines across the top.
Let the glaze sit for several minutes after decorating. It will begin to set and create a sweet, smooth finish.
If you have leftover glaze, cover it tightly and keep it at room temperature for a short period. Stir it well before using again.
I’ve noticed that the glaze is easiest to work with when it’s freshly mixed, so try to prepare it just before decorating your baked treats.
Conclusion
This Pink Glaze Recipe is one of those simple recipes that can make an ordinary baked treat look extra special.
With just powdered sugar, milk, and a little food coloring, you can create a smooth, sweet glaze in minutes.
Adjust the consistency to make it perfect for spreading or drizzling, and choose a soft pastel pink or a brighter shade depending on your dessert.
Pink Glaze Recipe
Ingredients
Method
- Add the powdered sugar to a small mixing bowl and break up any lumps.
- Slowly add the milk while stirring continuously.
- Add a tiny pinch of red food coloring.
- Mix the ingredients together with a spoon or small whisk.
- Continue mixing rapidly until the glaze is smooth and evenly colored.
- Check the consistency by lifting the spoon and allowing the glaze to drip back into the bowl.
- If the glaze is too thick, add a few drops of milk. If it is too thin, add a little more powdered sugar.
- Drizzle or spread the finished glaze over completely cooled baked goods.
Notes
- Add milk slowly because you may not need the entire 2 tablespoons.
- A tiny amount of red food coloring is enough to create a soft pink shade.
- Add more food coloring gradually for a brighter pink.
- Add powdered sugar to thicken a runny glaze.
- Add a few drops of milk to thin a glaze that is too thick.
- Let baked goods cool completely before glazing.
- Use the glaze soon after preparing it for the easiest decorating.